DMP-A6 Setting Menu Introduction---Network, General, Transfer, About
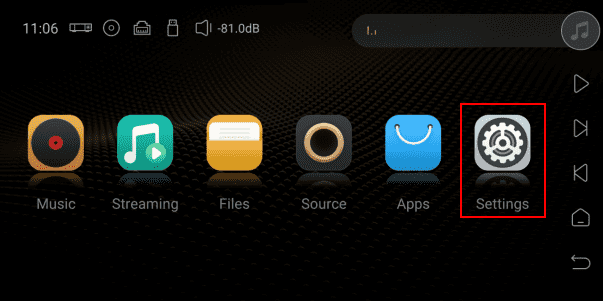
How to Access “Settings” Menu of A6
“Settings”menu is on the main interface of DMP-A6, click to enter it.
IV. Network
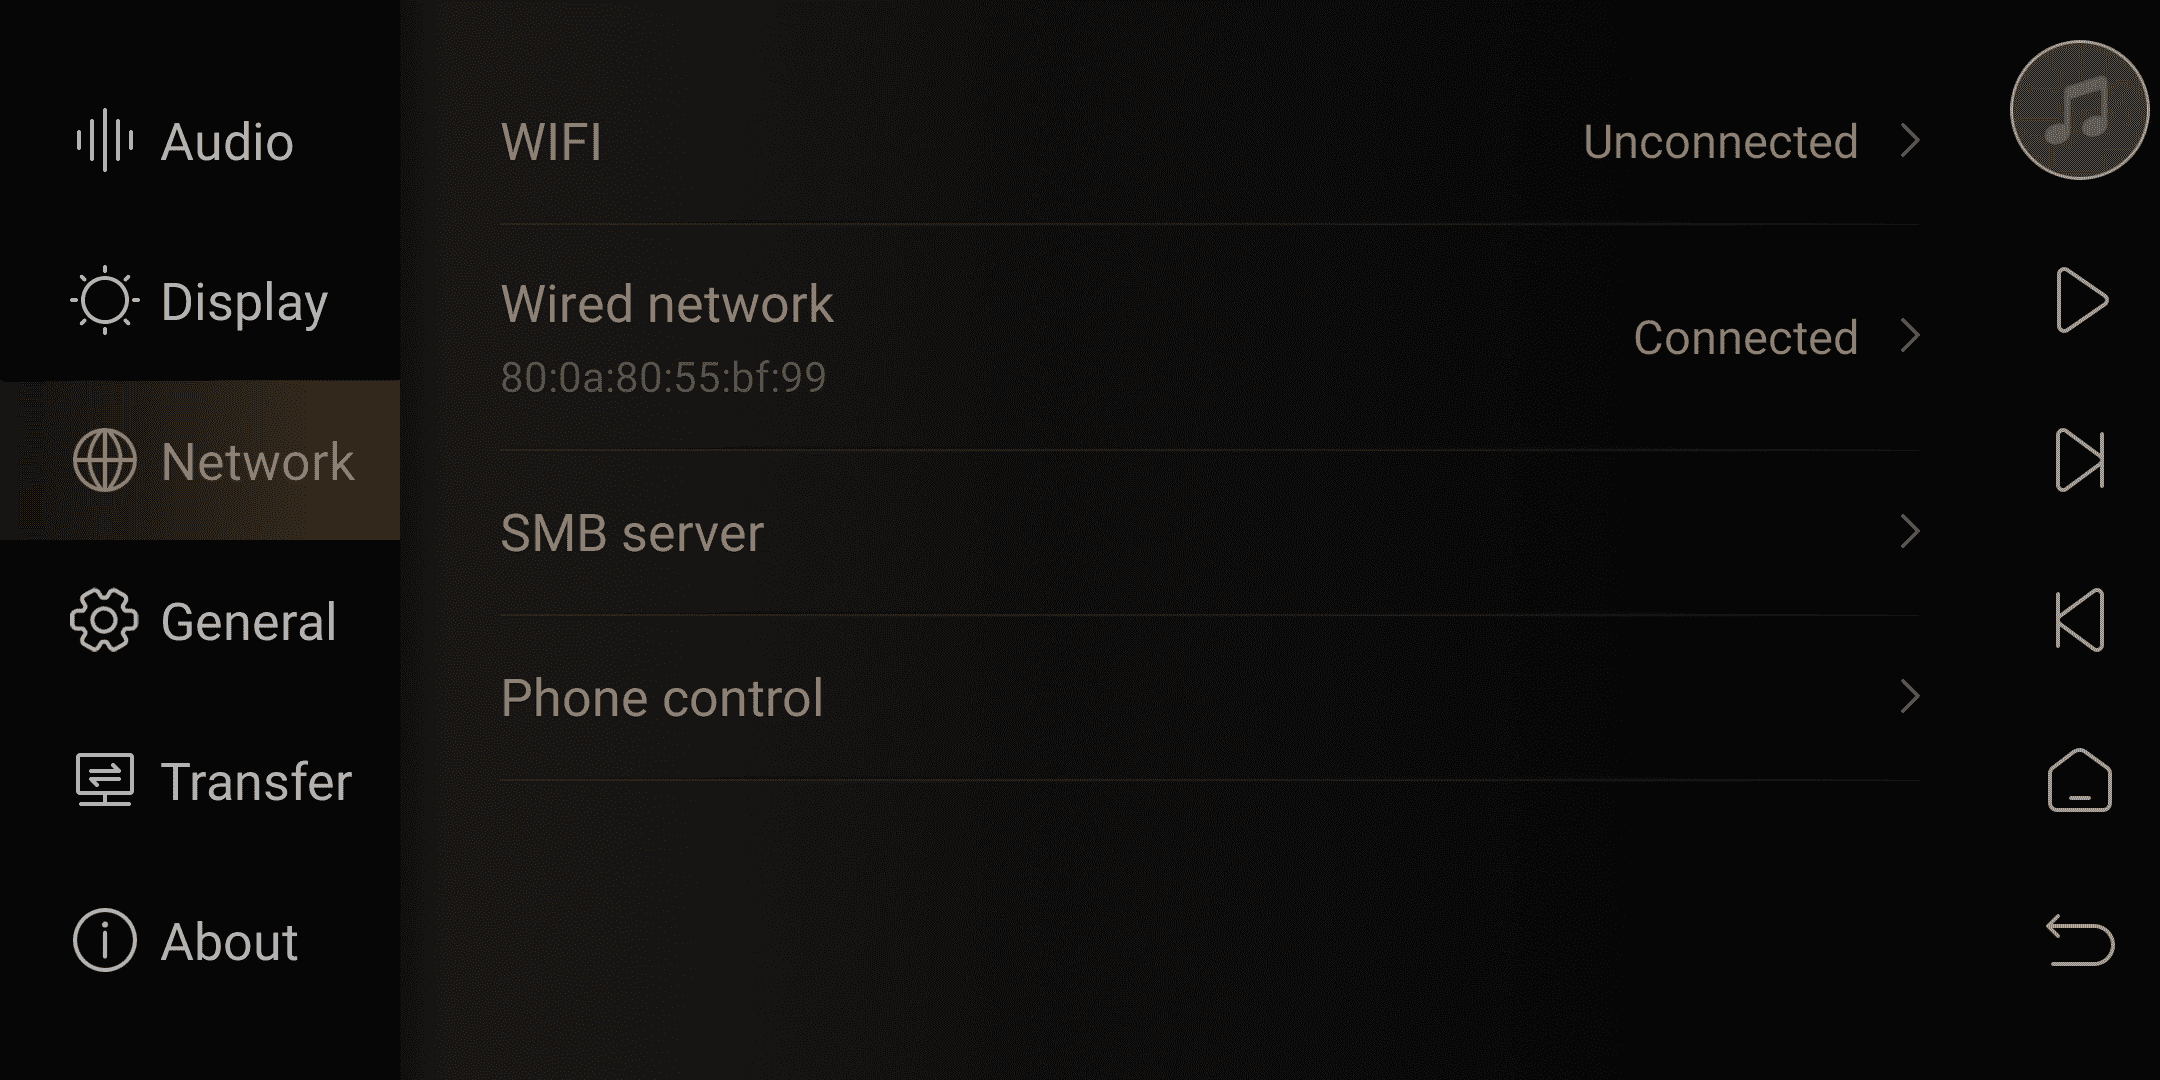
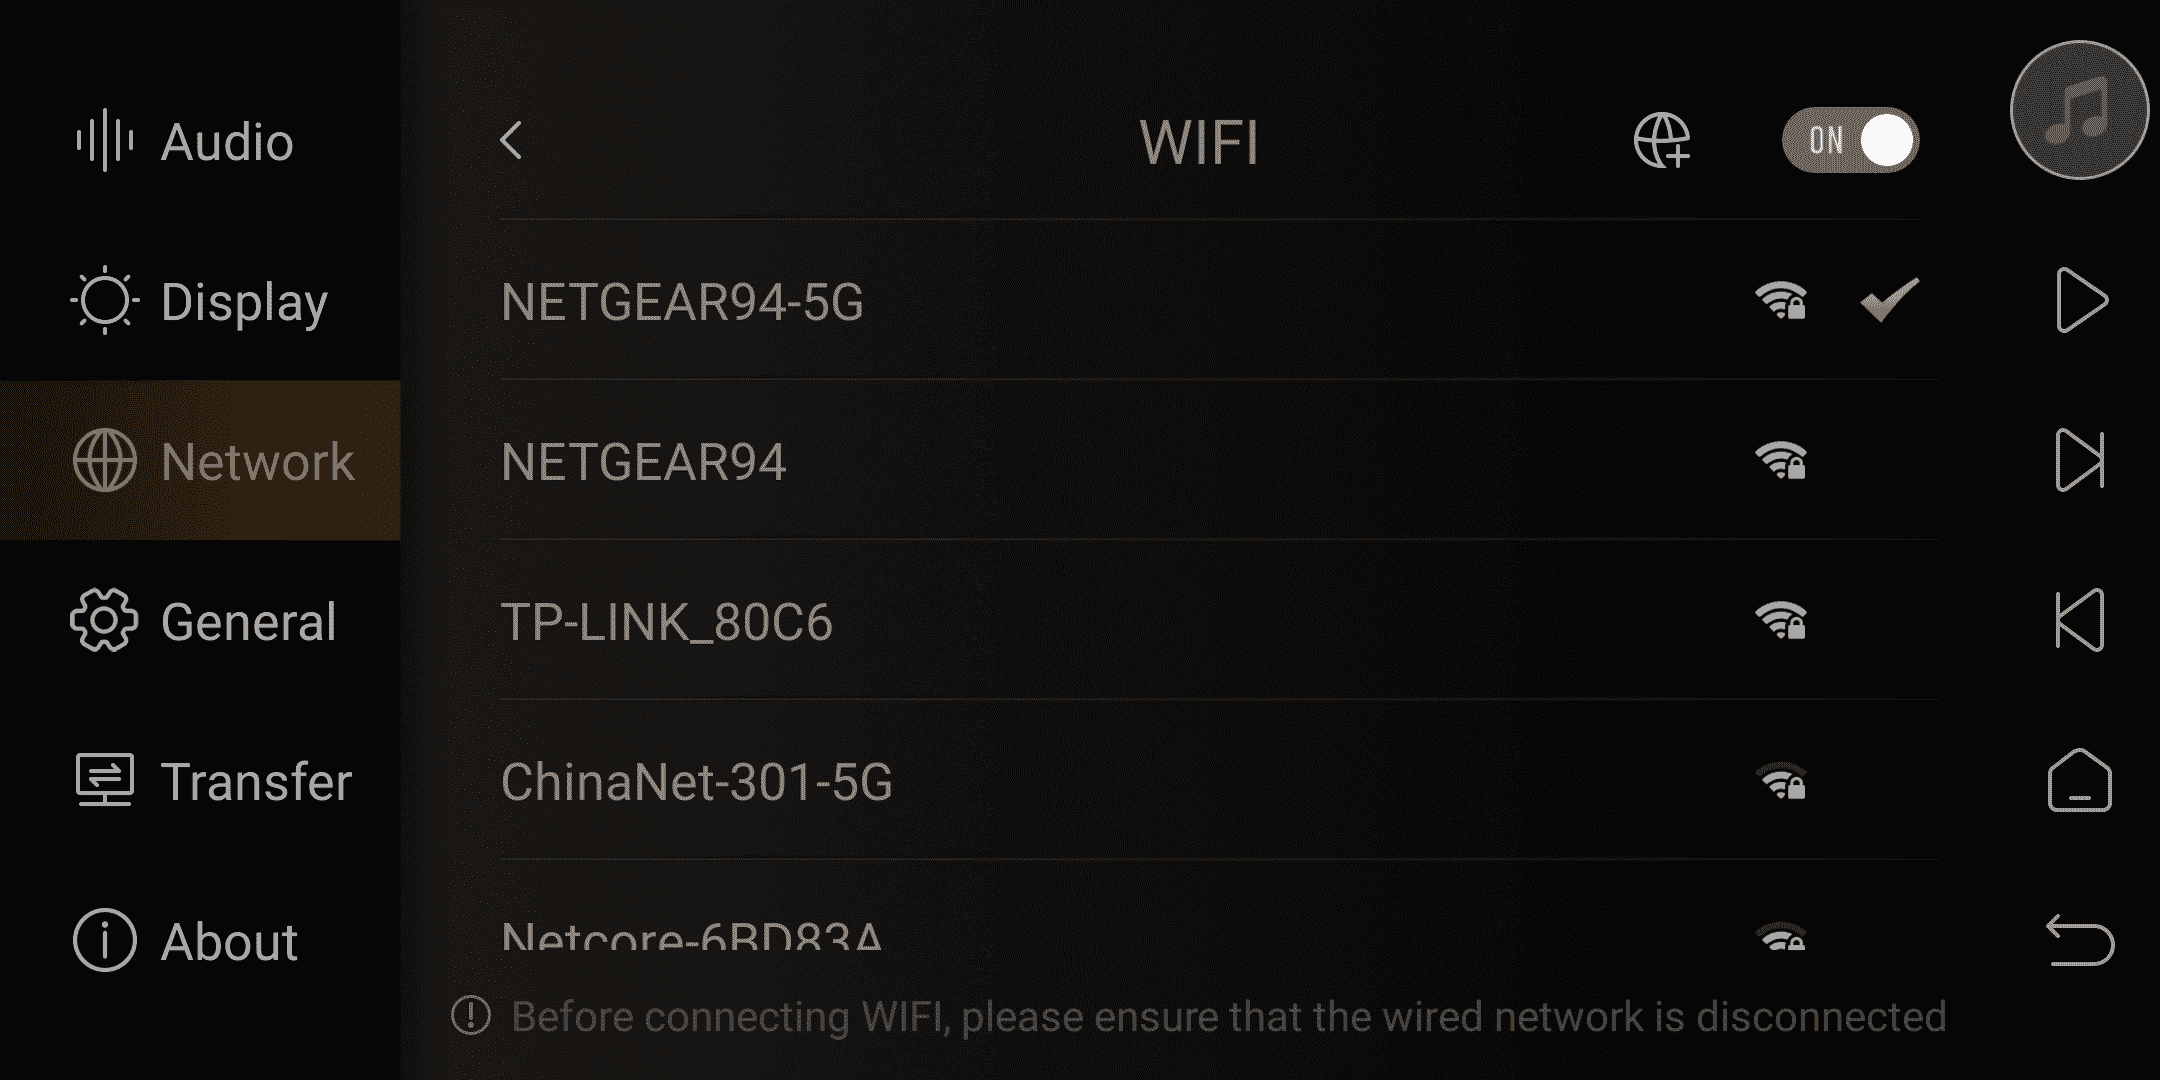
1. WiFi
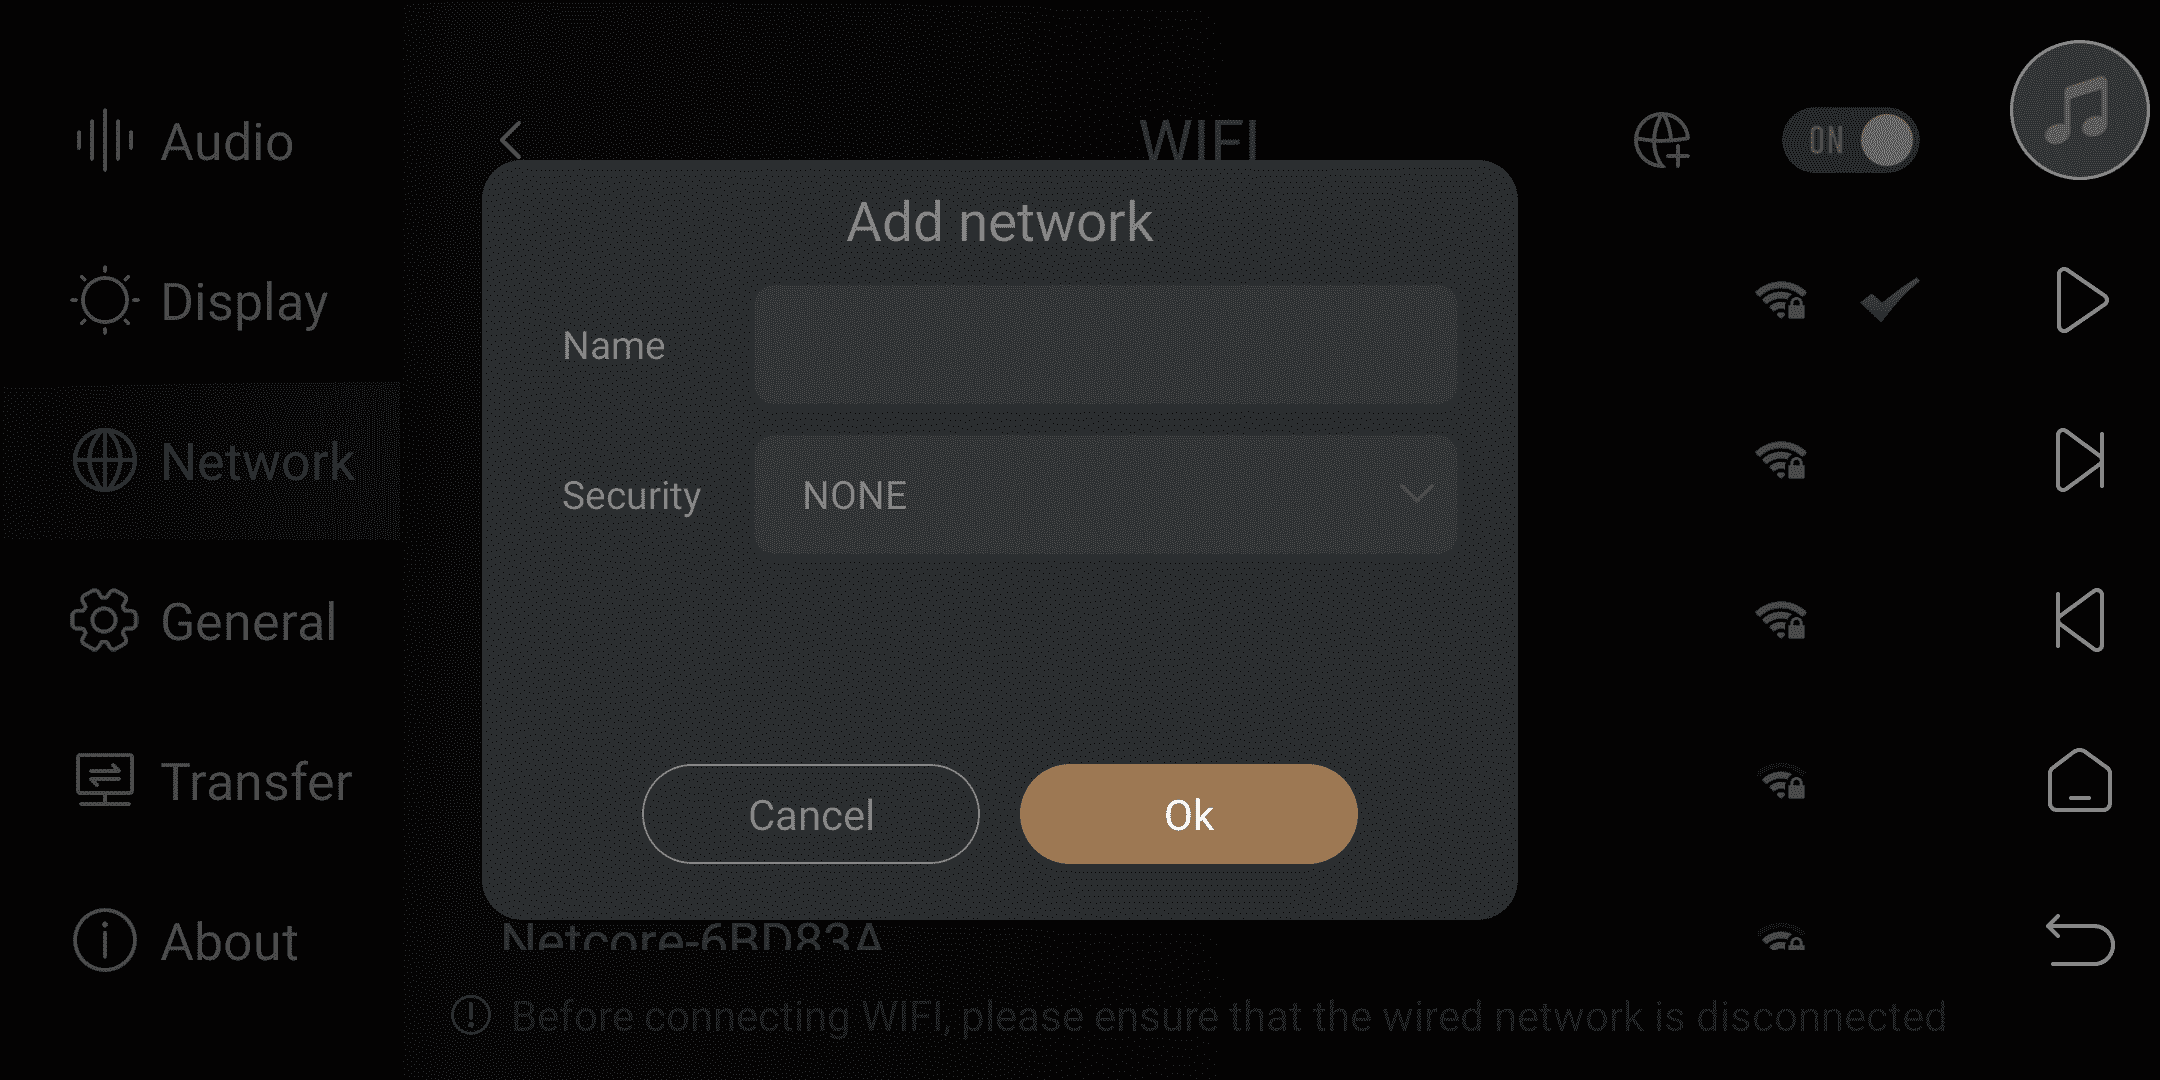
Wireless networking feature allows for automatic searching and connection to nearby WiFi networks. You can also manually add WiFi networks by tapping the + icon in the top right corner of the touch screen (supports hidden WiFi networks).
Friendly reminder: You can choose either WiFi or wired connection, but they cannot be used simultaneously.
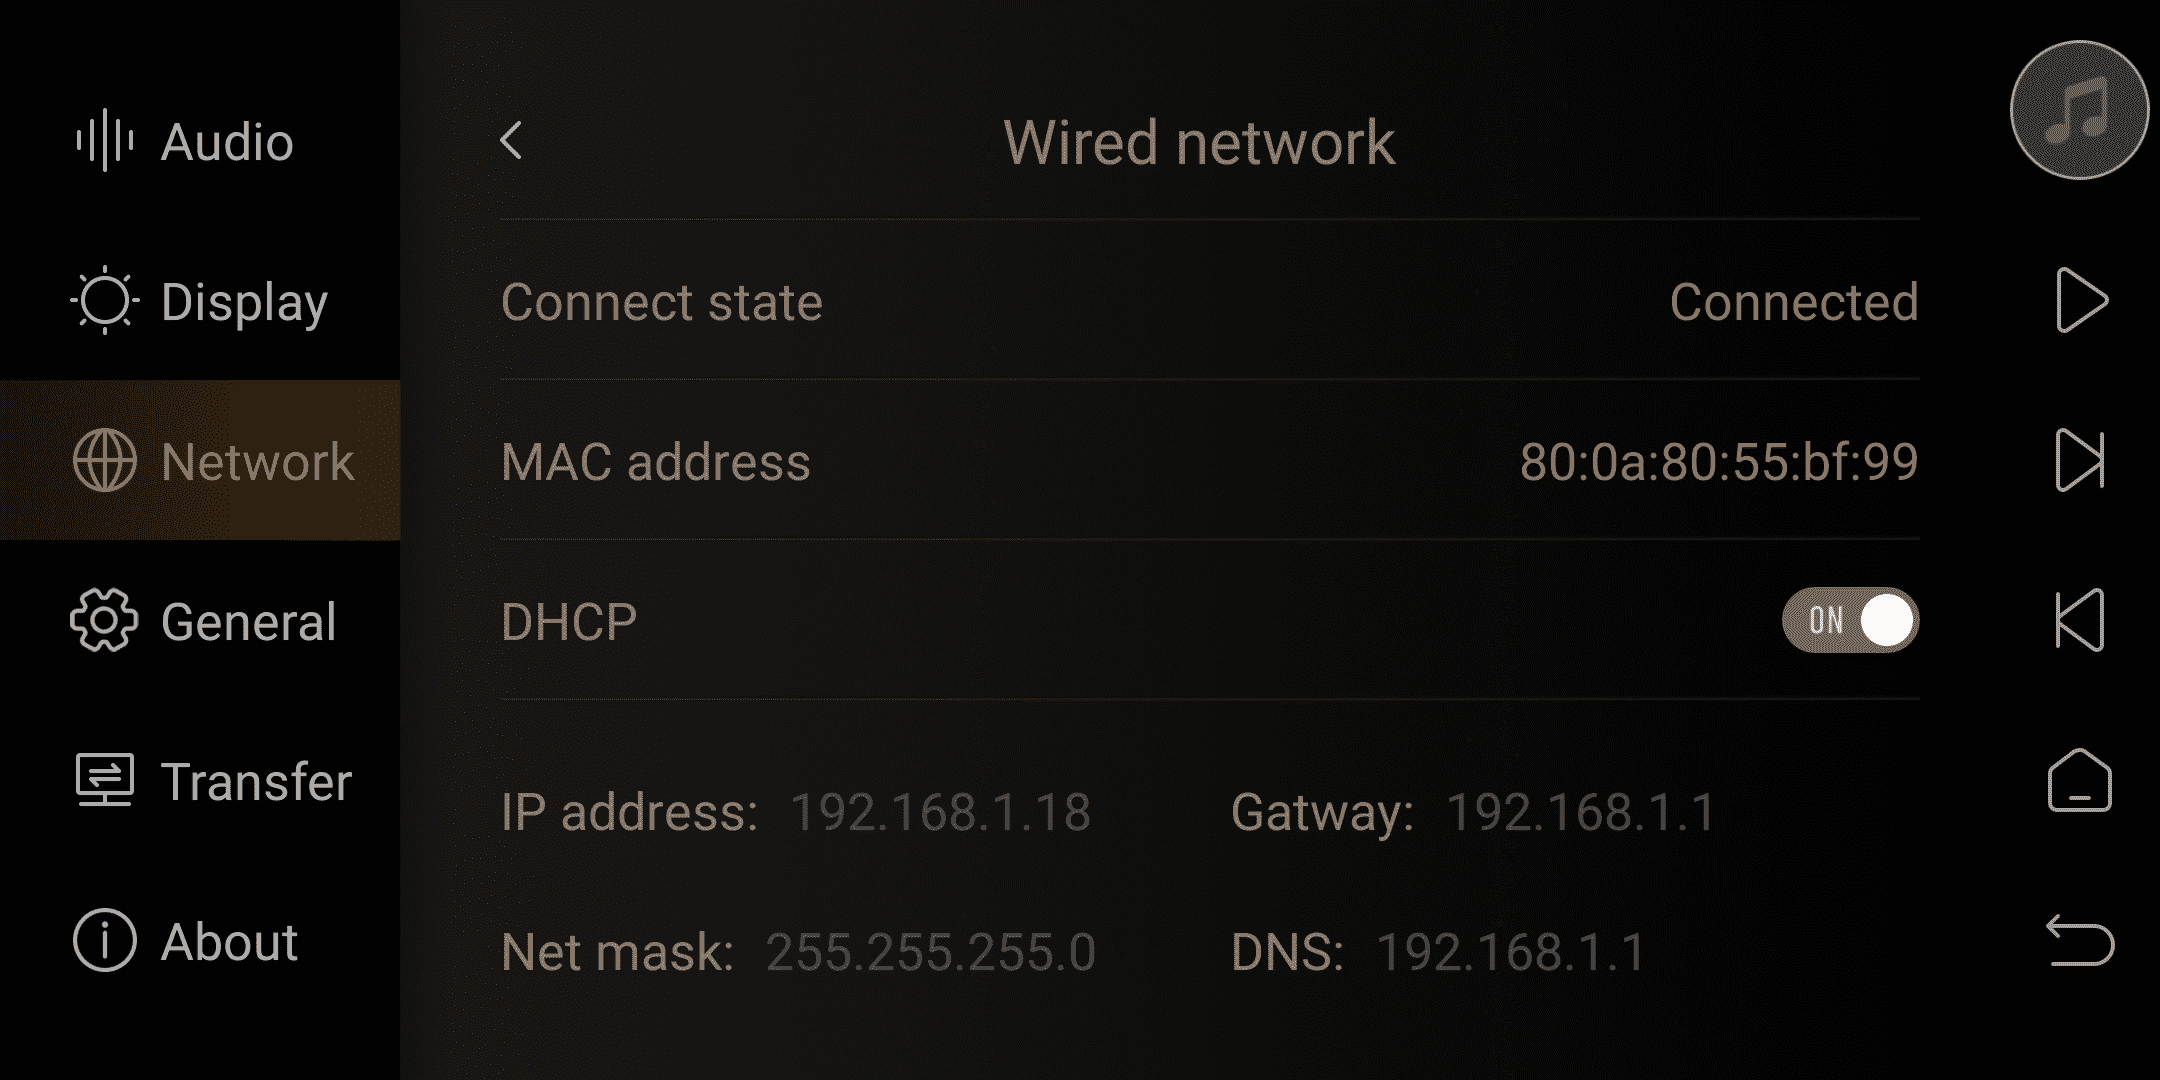
2. Wired network
Wired network connection, connect to the LAN port of the router or switch.
Enable DHCP: Automatically obtain the IP address assigned by the router. Disable DHCP: Set a static IP address manually. Please use it after successfully obtaining an IP address through automatic DHCP.
Friendly reminder: Choose either WiFi or wired network, they cannot be used simultaneously.
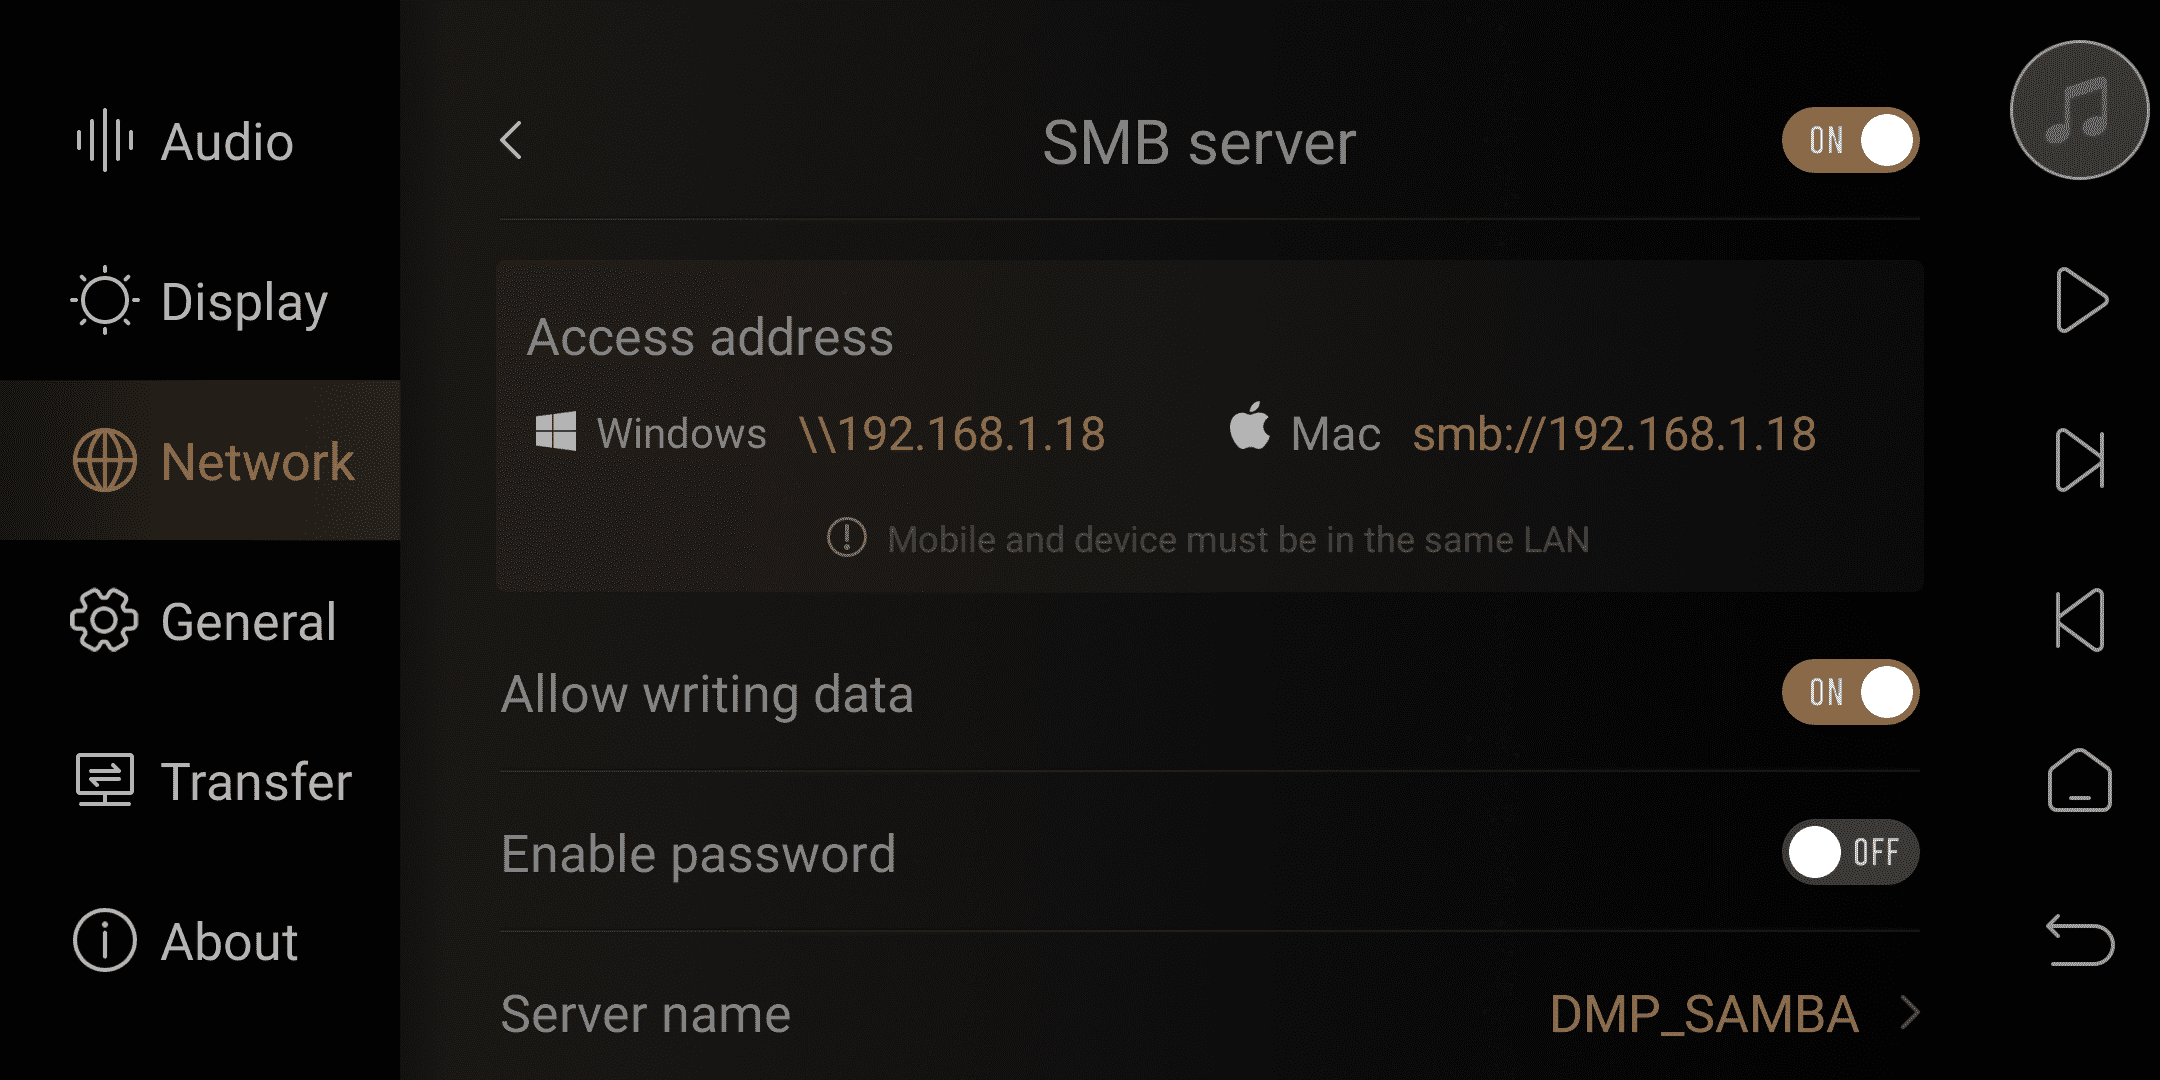
3. Samba Server
Enabling this function allows the phone and PC to access the storage space of the media player via the network SMB protocol for music file transfer and management.
Friendly reminder: The phone and PC must be connected to the same local area network as the device.
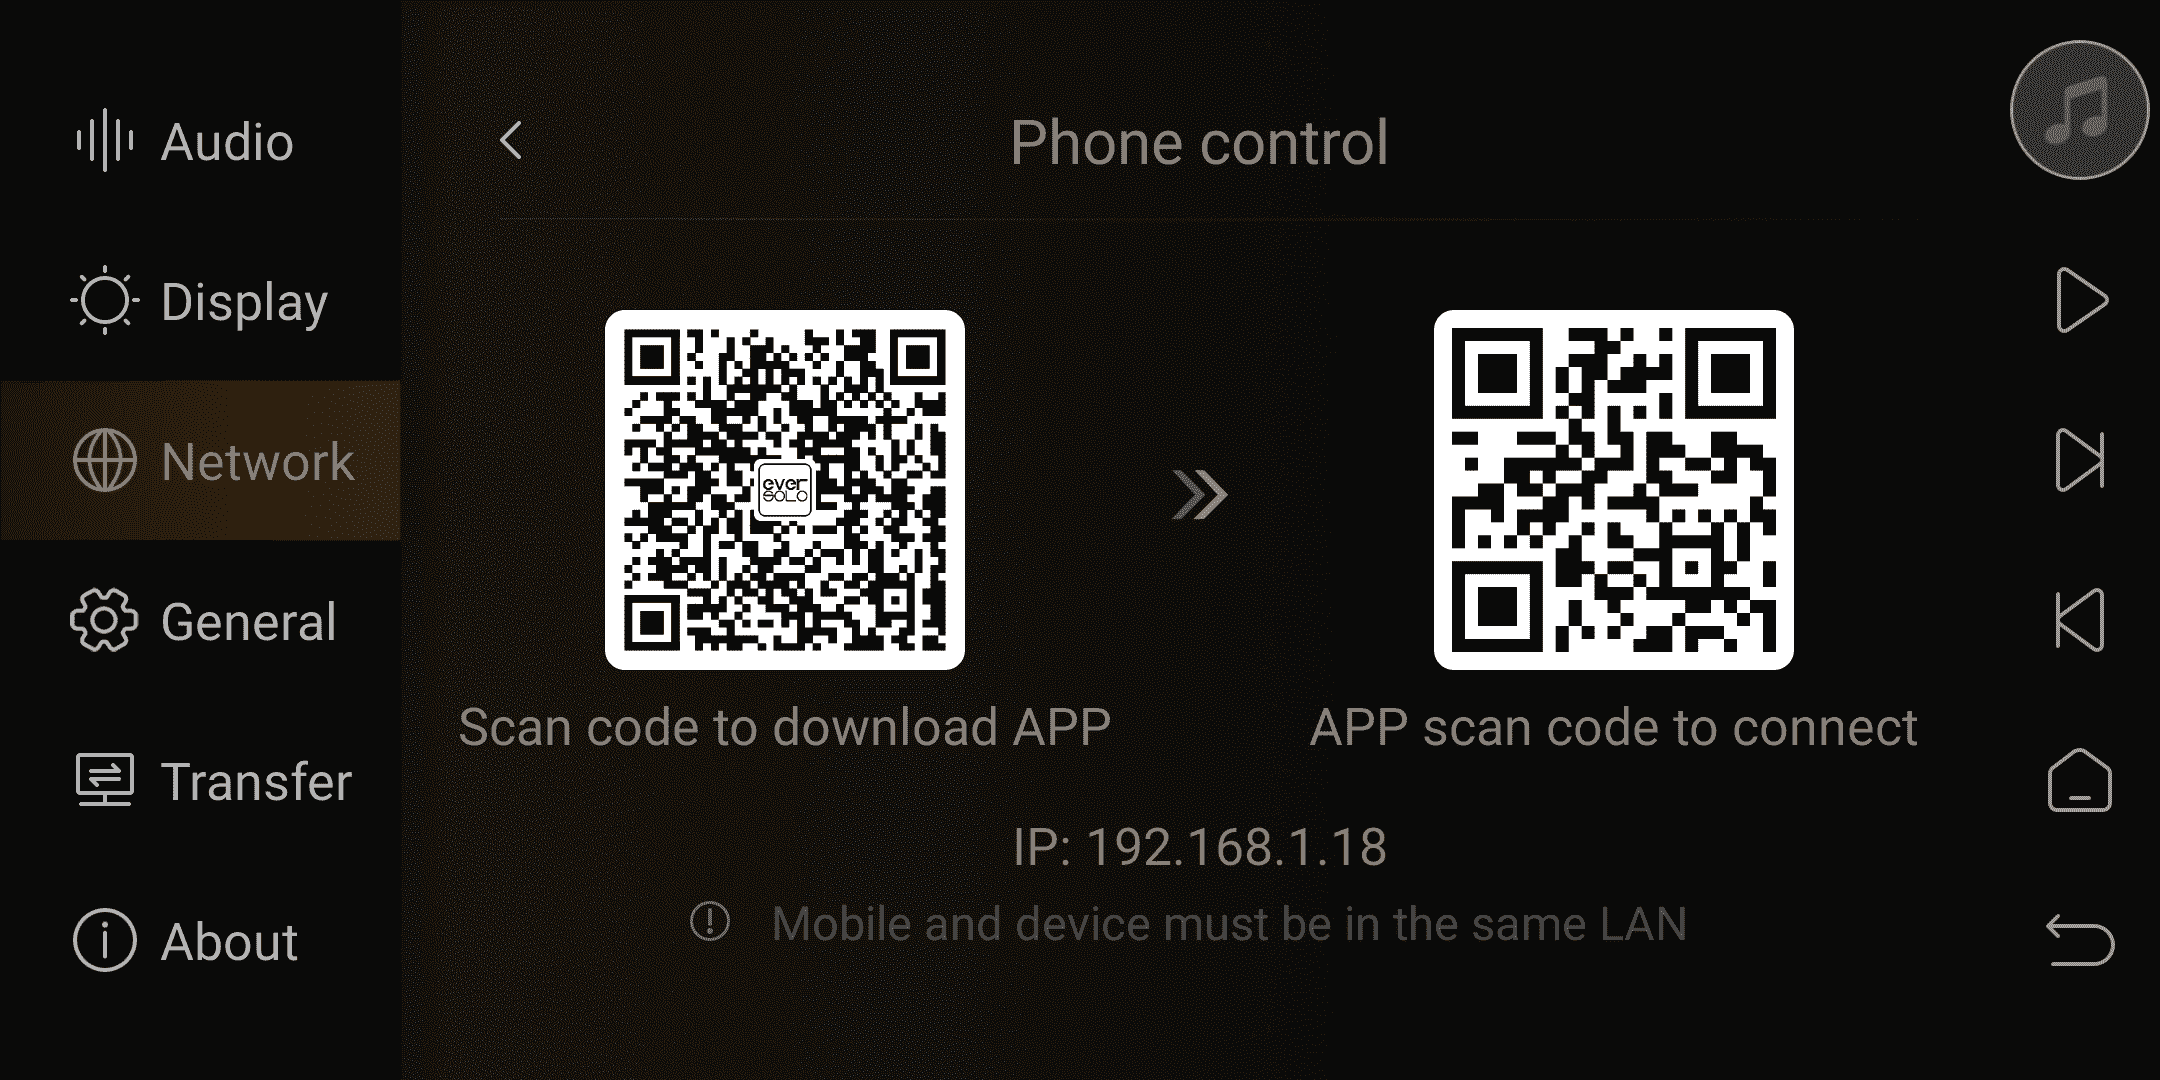
4. Phone control
Left QR code: Scan the QR code with your smartphone or iPad using a browser to download the Eversolo Control controller.
Right QR code: Scan the Eversolo Control QR code to pair and connect with DMP-A6.
V. General
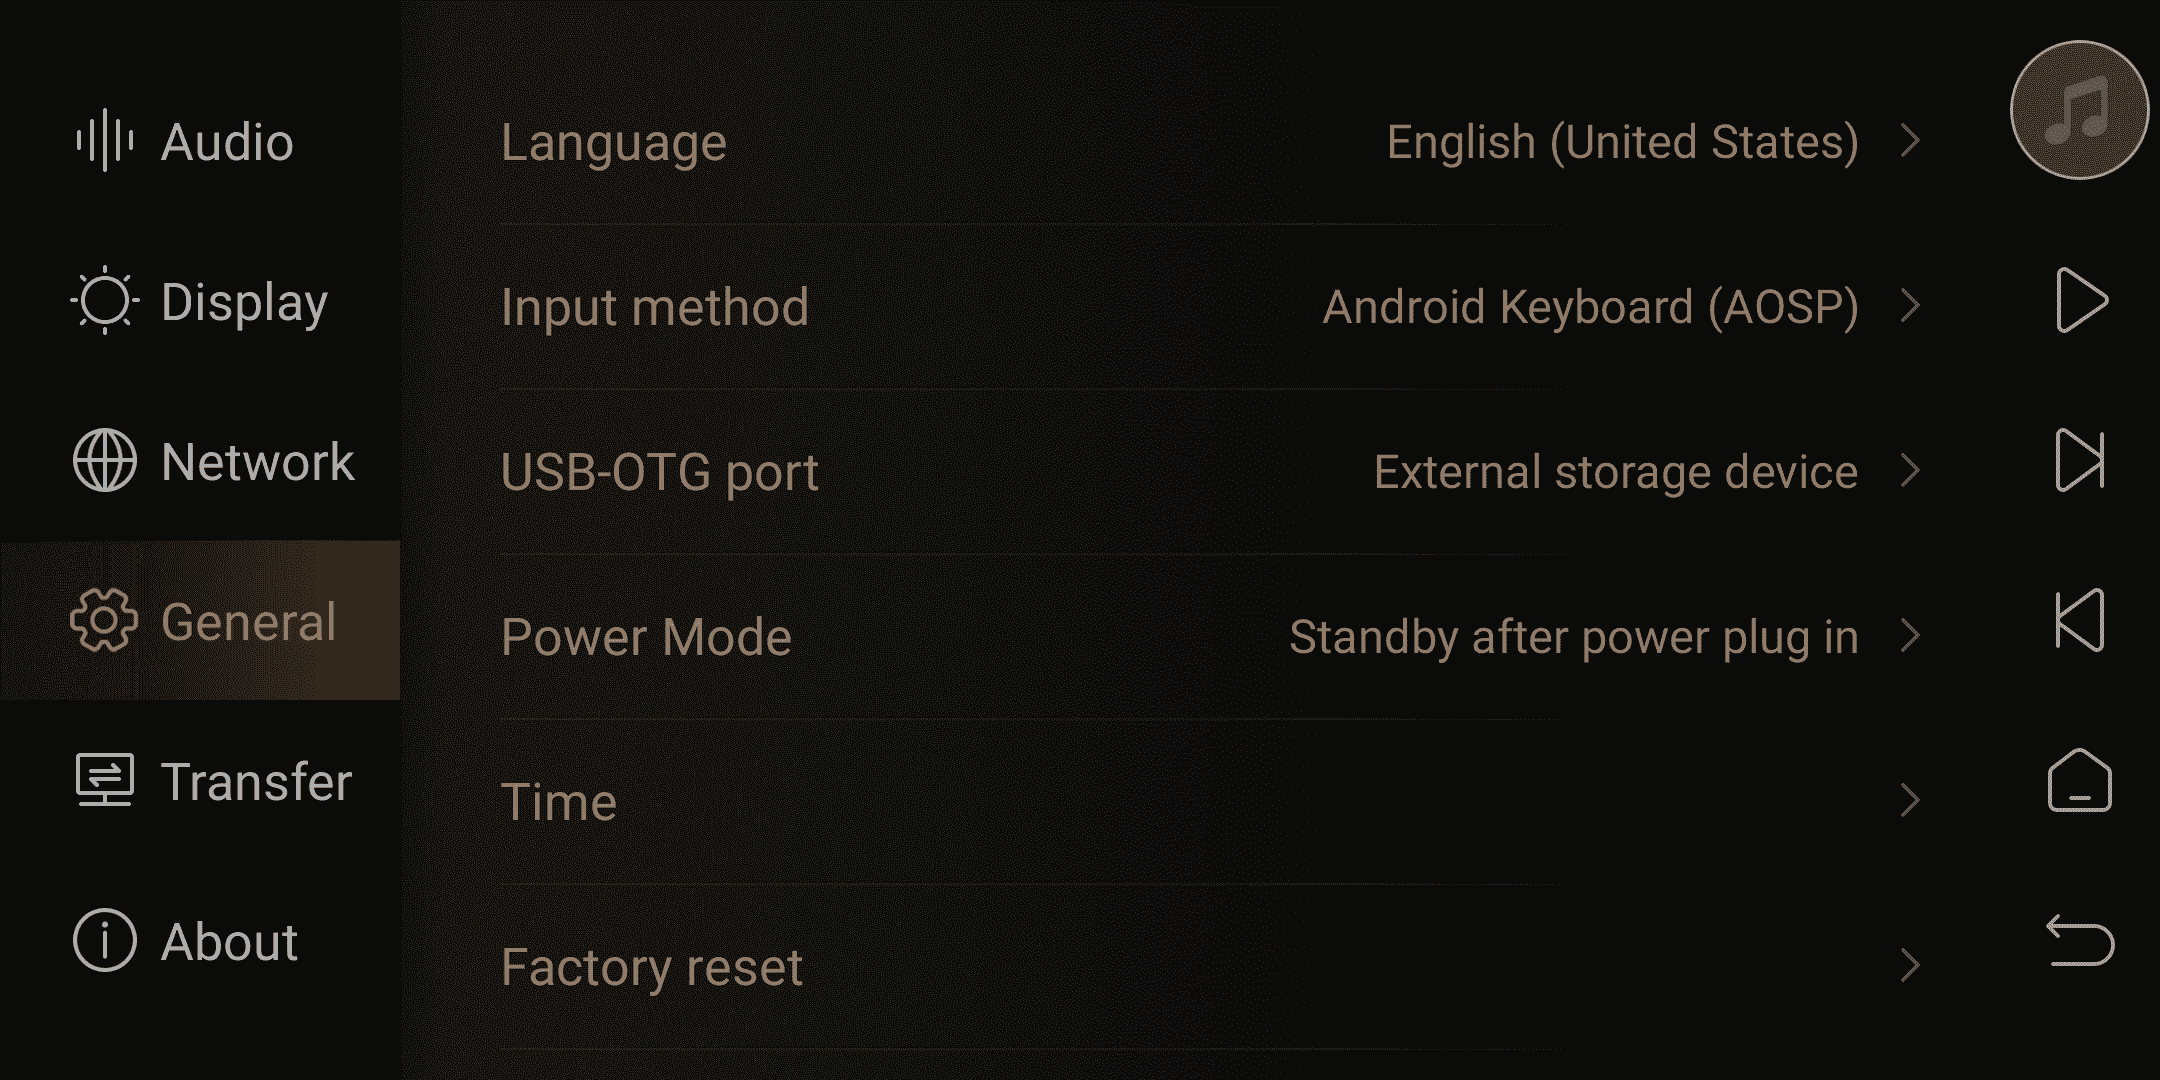
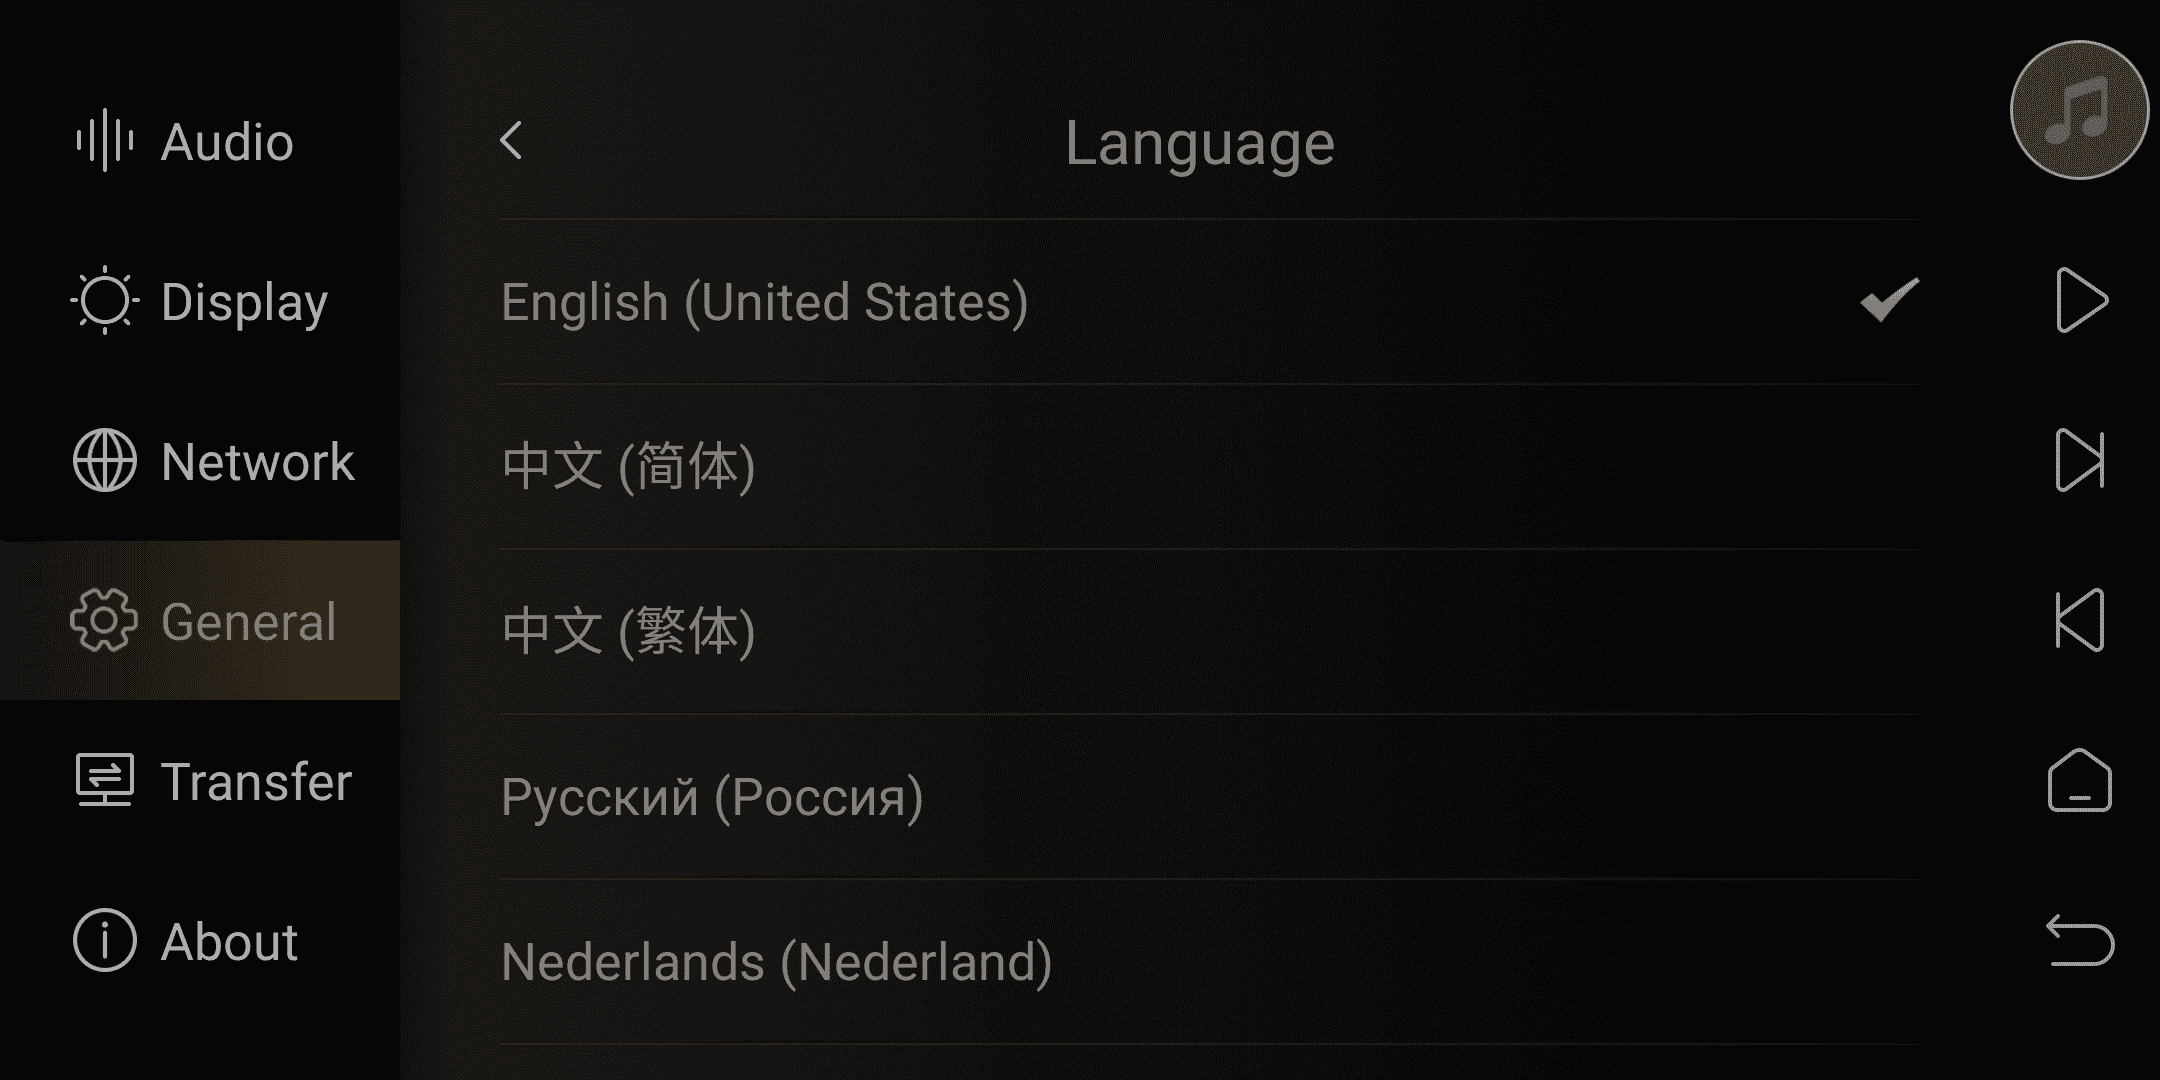
1. Language
The system’s language can be set here.
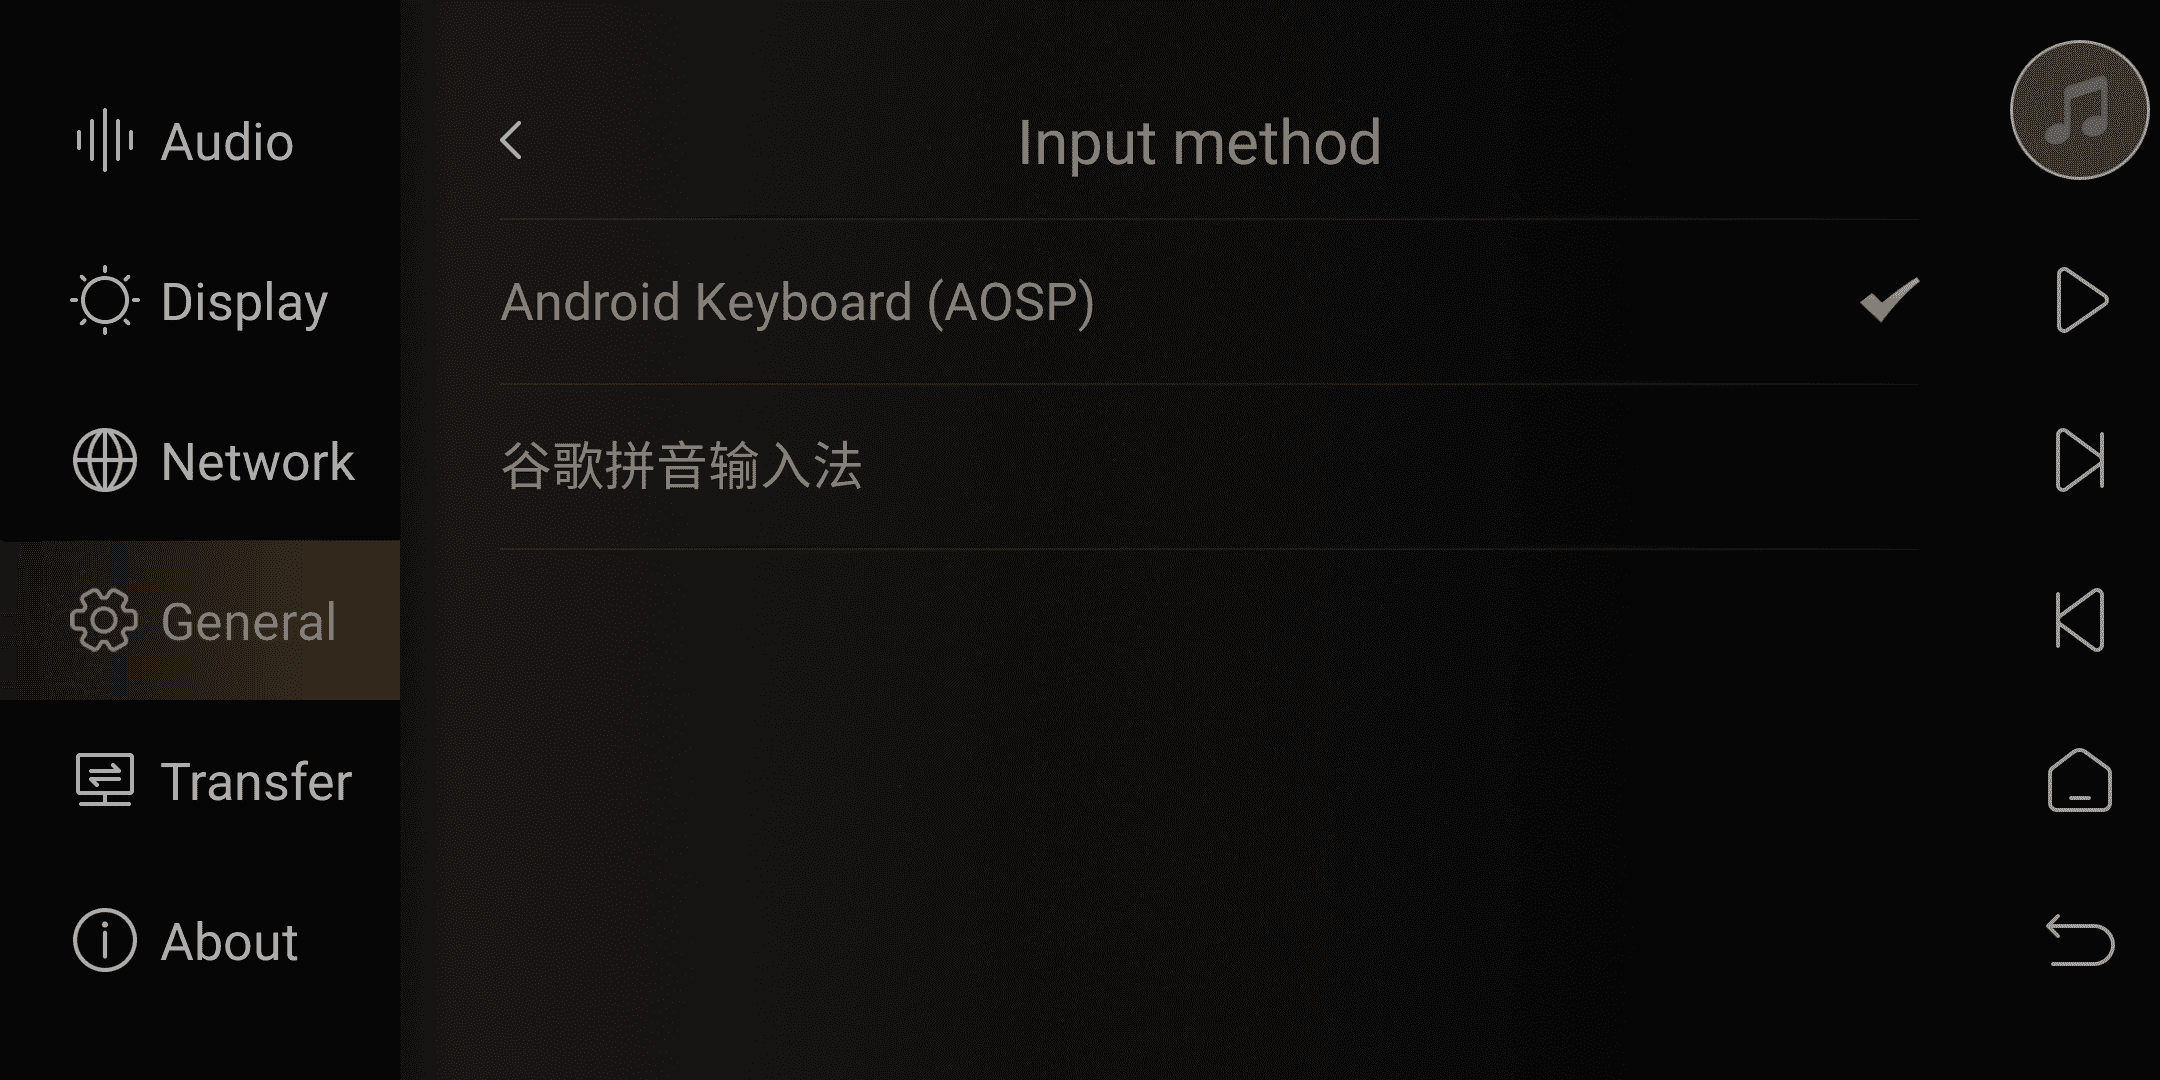
2. Input method
Switch between built-in and third-party input methods.
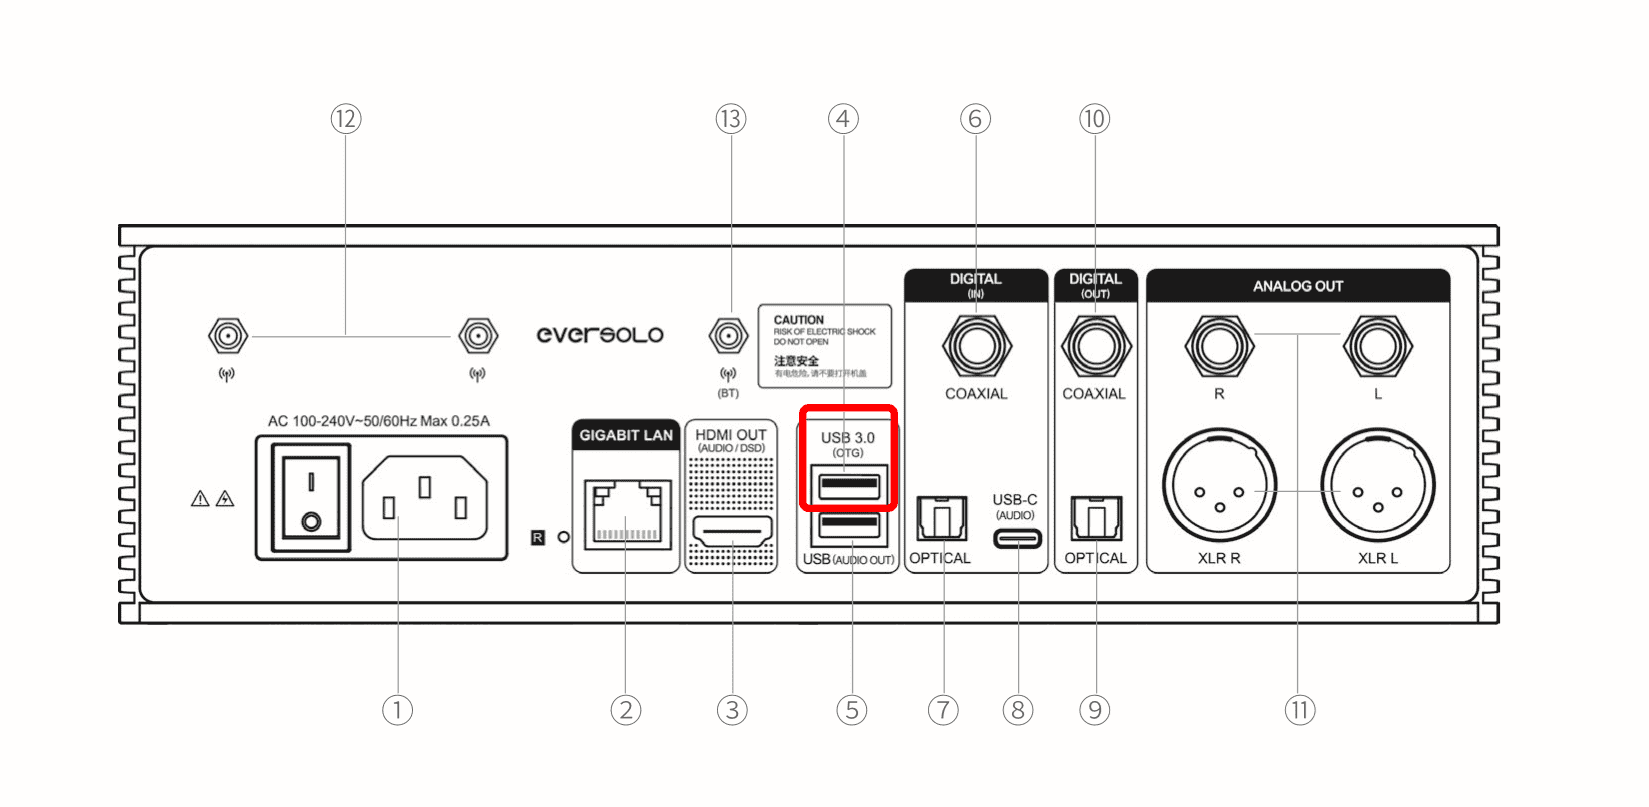
3. USB-OTG Port
PC File Transfer: Set the USB 3.0 OTG port to USB OTG mode, connect it to a PC using a USB data cable, and copy and manage files between the local computer and the DMP-A6 hard drive.
Friendly reminder: USB-OTG mode will be recognized by Windows system automatically, but Mac OS system needs to install OpenMTP to recognize it!!!
External Storage Configuration: Set the USB 3.0 OTG port to USB 3.0 mode, and connect external mobile storage devices such as USB flash drives and USB portable hard drives.

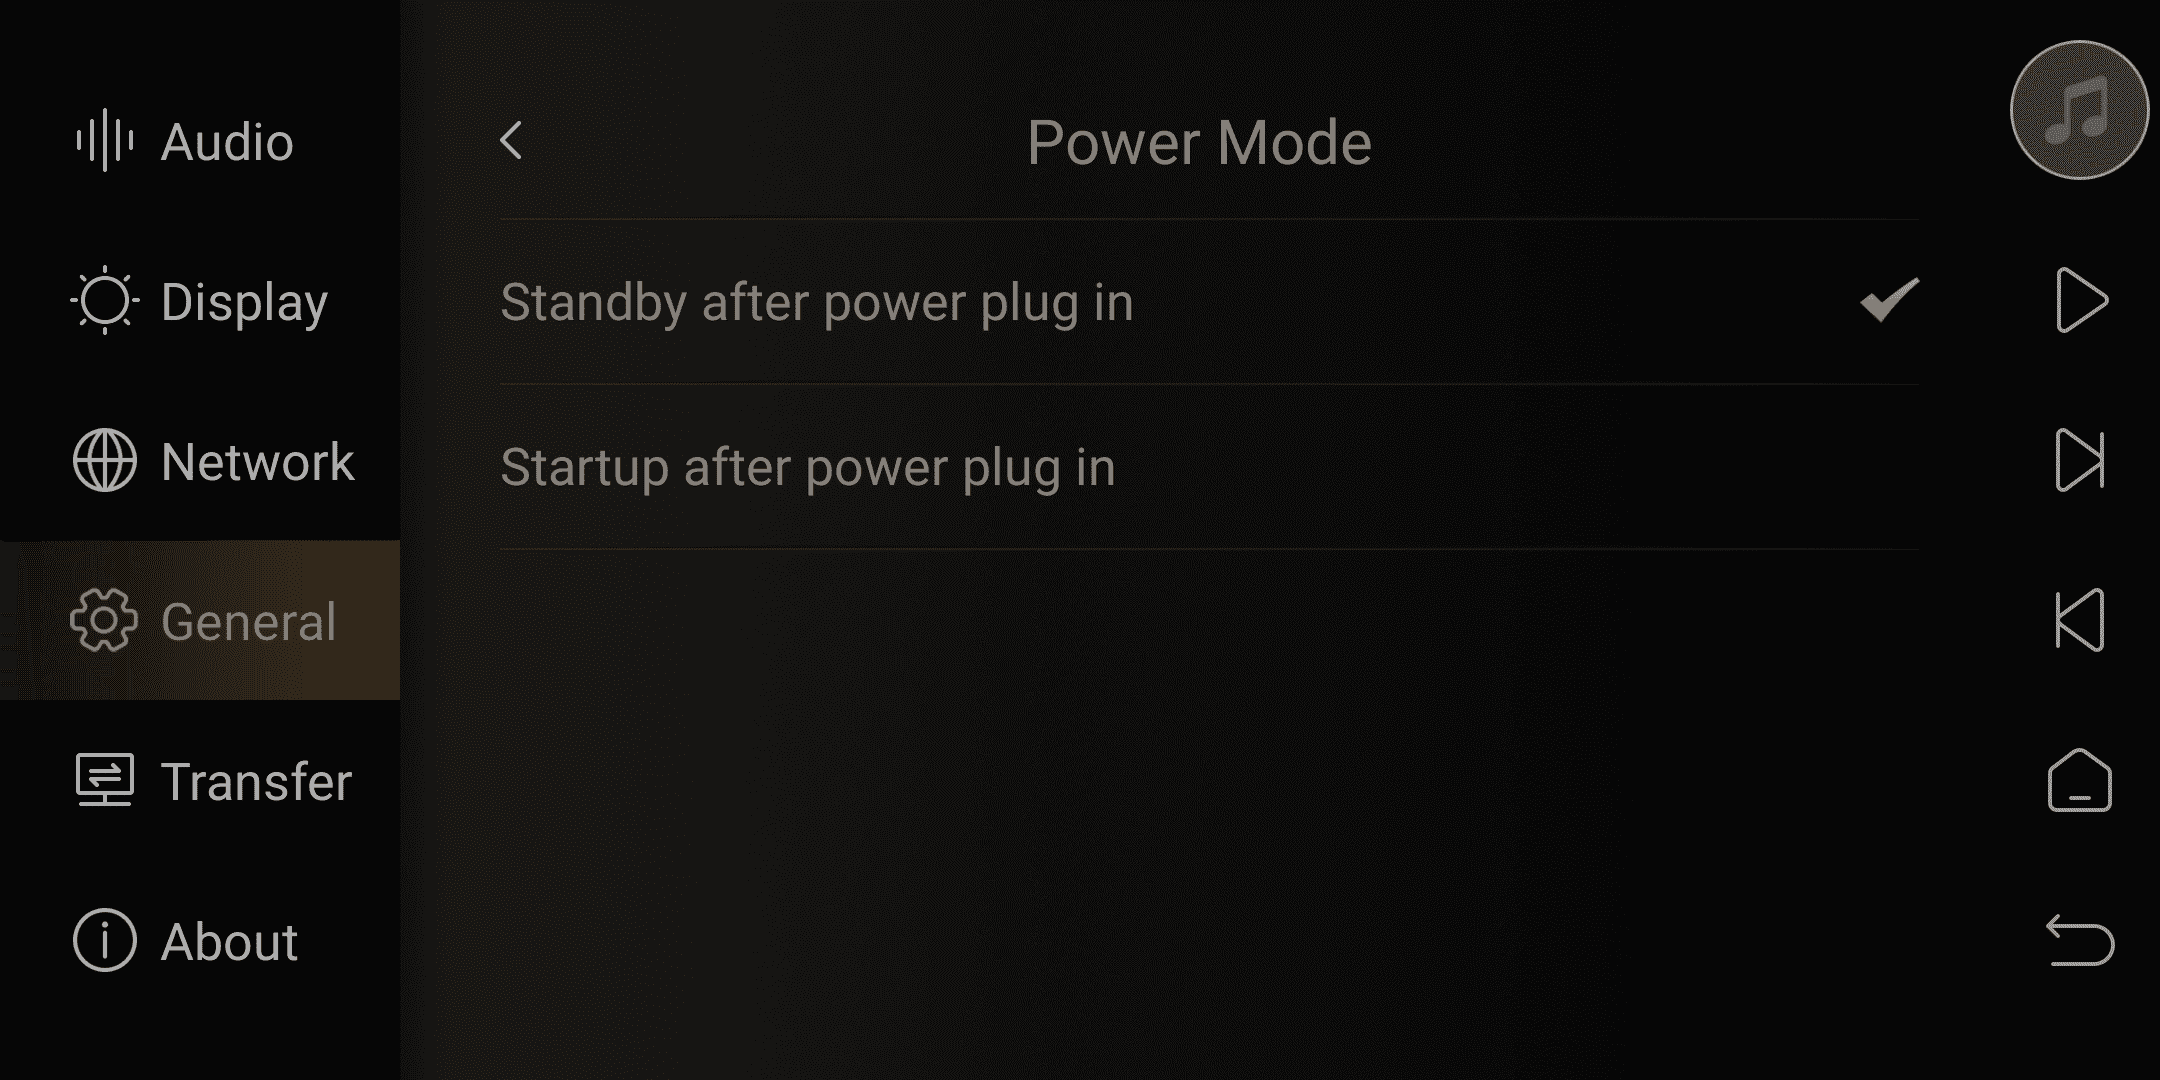
4. Power Mode
Standby after power plug in:After powering on, the device is in standby mode and needs to be turned on by pressing the knob button.
Startup after power plug in:After powering on, the device is turned on automatically.
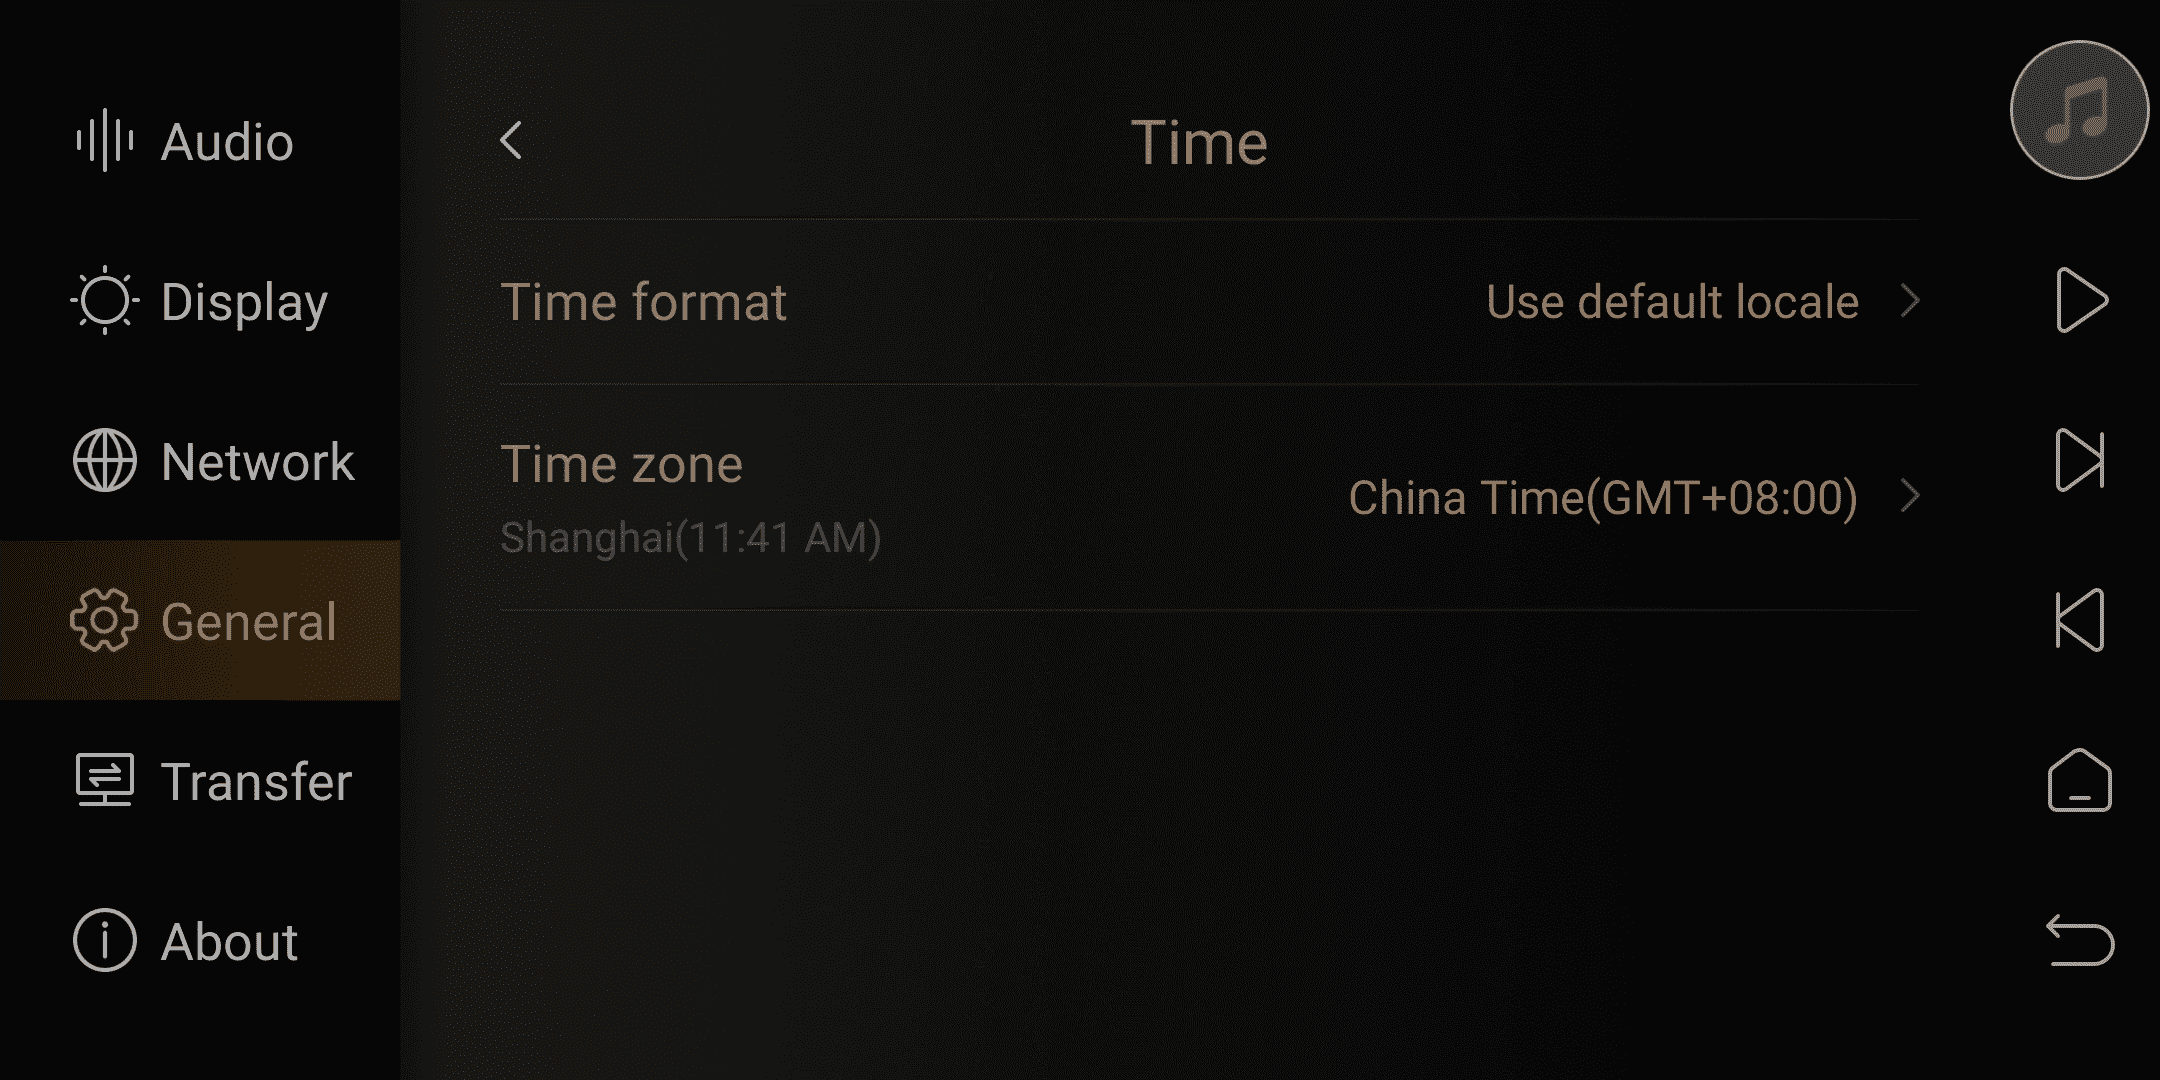
5. Time Setting
Time format:The device's time display is either 12-hour or 24-hour format.
Time zone:Time zone selections of different countries
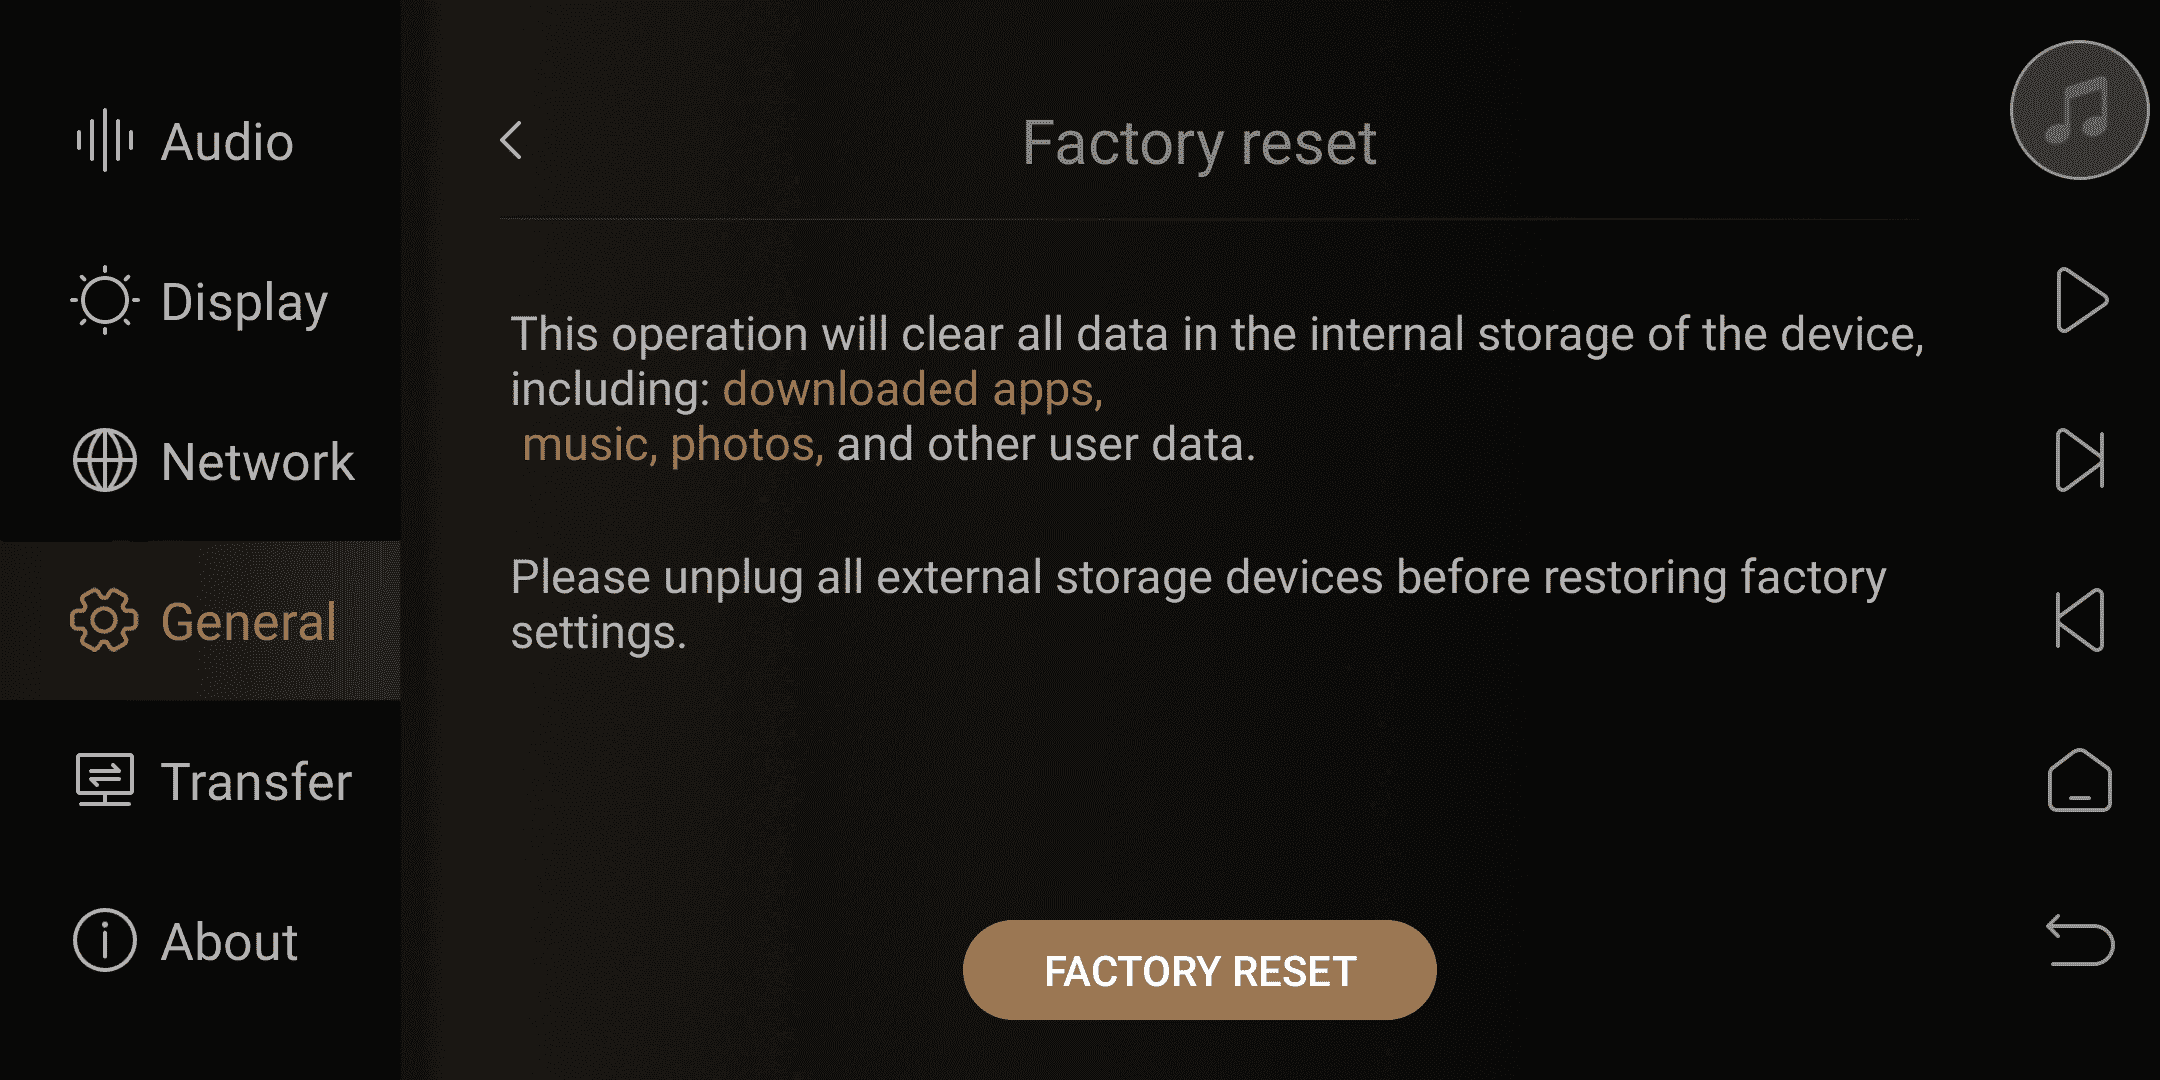
6. Factory Reset
Perform a local factory reset.
Friendly reminder:
Factory reset will not lower the software version.
Factory reset will erase all data in the system's built-in storage, including system apps and installed apps.
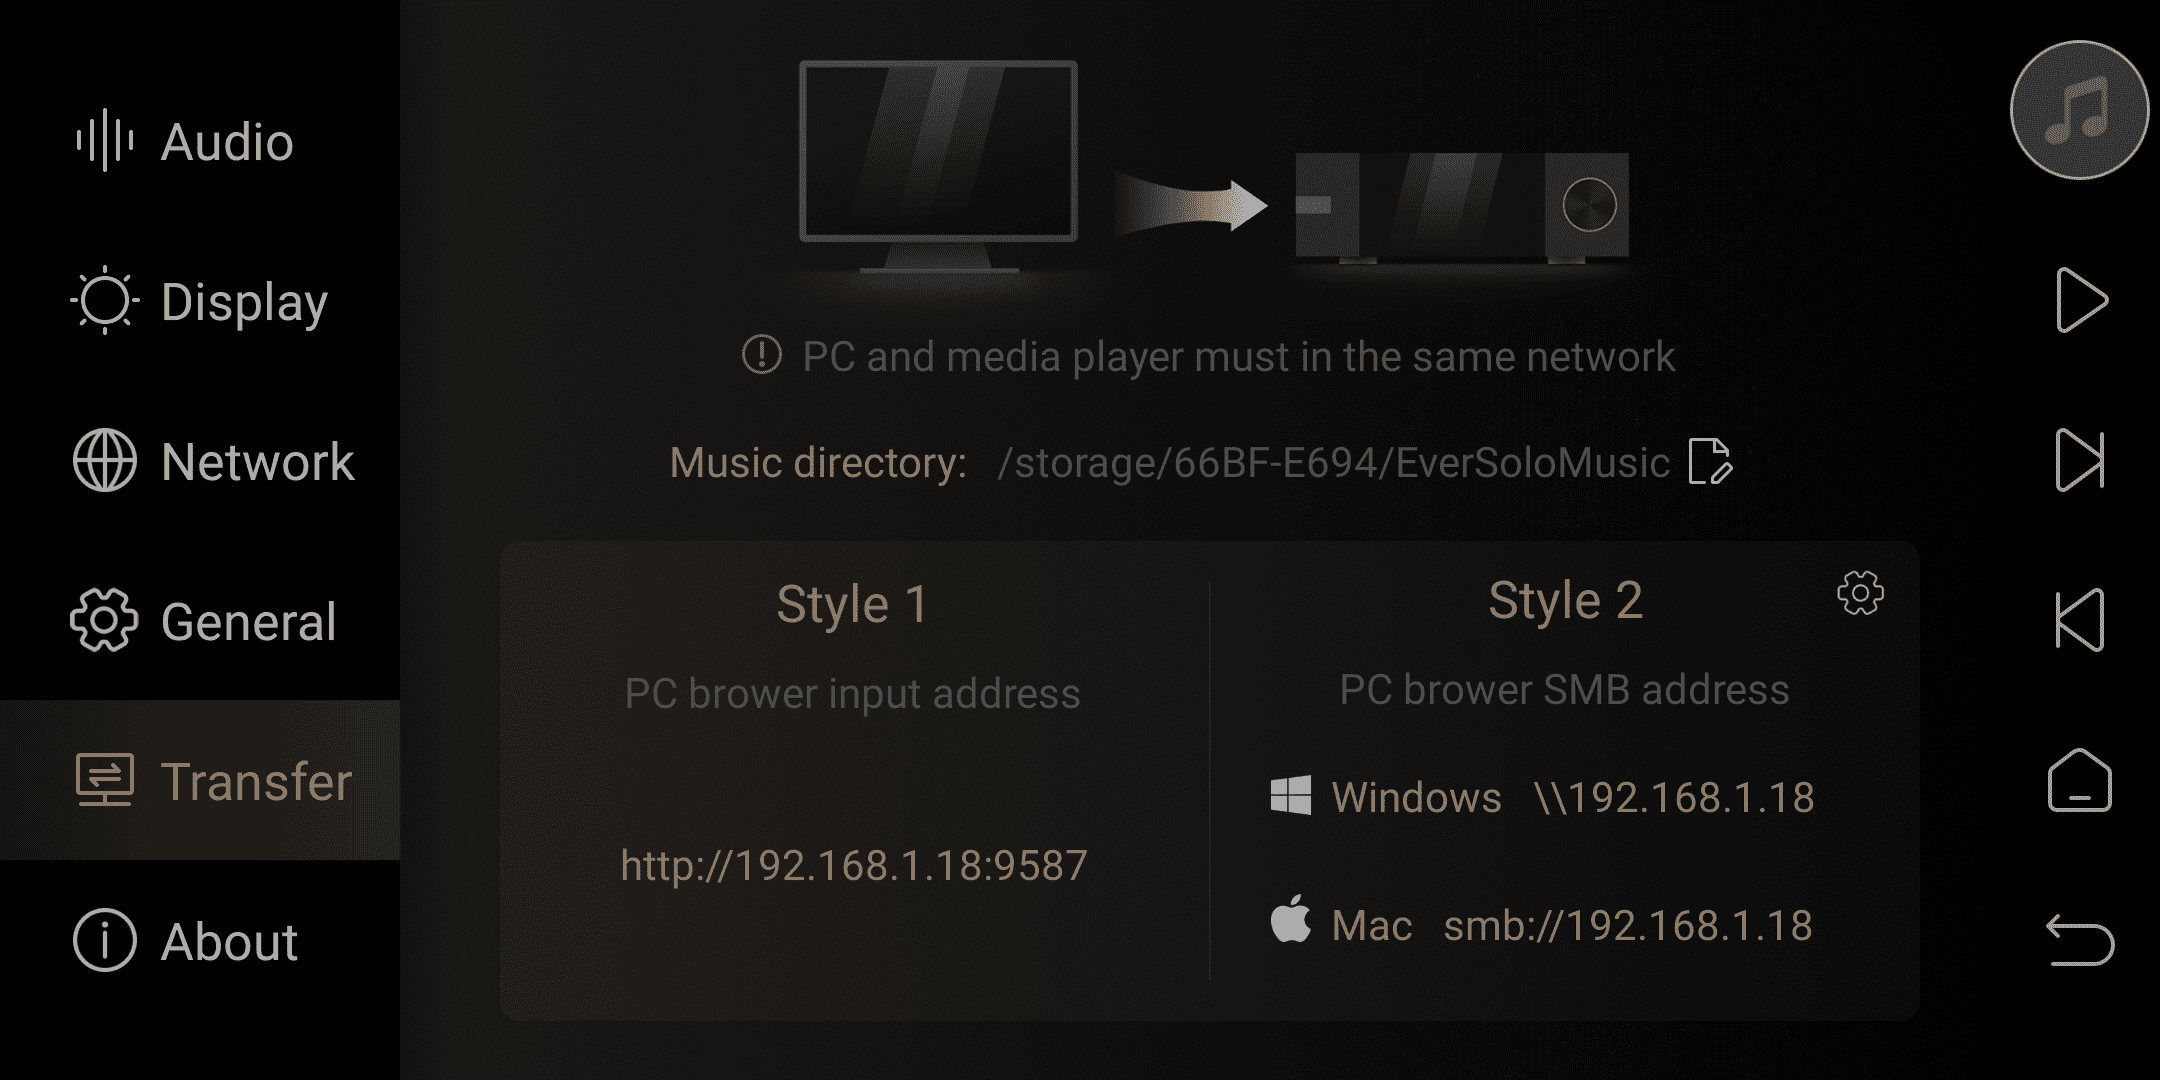
VI. Song Transfer
Please make sure that the computer and the device are on the same local network. Go to the settings menu and select "Transfer" Follow the instructions in the menu to transfer songs from the computer to the device. You can set the directory for saving songs in the Music directory section.
VII. About
This option allows you to view the model, software version, hardware parameters, as well as the IP address and MAC serial code.

